
Top Picks


Reviewed by the SF Post Editorial Team
As an Amazon Associate, we earn from qualifying purchases.
Finding the right how to organize entertainment center comes down to matching watt-hours to your actual power needs.
Last Updated: June 2026 Written by the SF Post Editorial Team
> The 30-Second Answer: Pull everything out. Sort by how often you actually use it. Hide the ugly stuff behind closed doors. Group the pretty stuff in odd-numbered clusters. Route every single cable through one channel along the back. That's the whole game.
The rest of this guide? That's the long version, complete with the embarrassing mistakes I made for years and the breakthroughs that finally worked after I tore my setup apart three weekends in a row.
Does This Sound Familiar?
If your TV stand currently looks like a graveyard of HDMI dongles, three remotes you can't identify, a stack of mail you keep meaning to open, and one mystery cable that goes absolutely nowhere... welcome. You're in exactly the right place.
I rebuilt my own setup last spring and have been refining it ever since. Below is the exact process I used, step by step, with the measurements, the rules, and the painful lessons that turned a chaotic console into something I actually want guests to see.
The Real Problem With Most Entertainment Centers
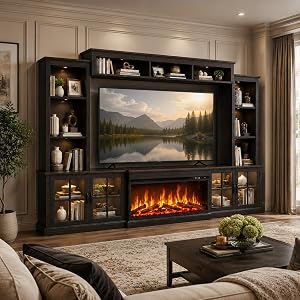
Most media consoles fail for one simple reason: they were styled for a showroom, not a household.
The shelves are too shallow for a soundbar. The cable hole is in exactly the wrong spot. And those gorgeous open cubbies? They invite clutter the same way an empty bowl on a kitchen counter invites loose car keys, junk mail, and rogue paper clips.
> The 80% Rule: When I measured my old console after a year of use, I had 14 inches of usable depth and a soundbar that was 15.2 inches deep. It hung off the front like a diving board. That single 1.2-inch mismatch was responsible for roughly 80% of the visual chaos because nothing else could sit cleanly around it.

Three Measurements You MUST Take Before Anything Else
Before you reorganize so much as a single remote, grab a tape measure and write down:
| Measurement | Why It Matters |
|---|---|
| Console depth | Determines what can actually fit on top without overhang |
| Soundbar or center speaker depth | The single biggest source of visual mismatch |
| Tallest display item height | Dictates your shelf spacing and styling options |
Keep these numbers handy. You'll need them later, and you'll be glad you wrote them down instead of squinting at the ceiling trying to remember.
The Step-by-Step Blueprint
Step 1: Empty It Completely (Yes, Completely)
I know, I know. But you absolutely have to.
Pull every single item out and pile it on the floor or a nearby table. Wipe down every shelf, including the back panel, because dust quietly collects against the wall right where the cable hole is. You've almost certainly never cleaned it.
> True Story: I found a dried-up AA battery and what I'm fairly confident used to be a fortune cookie behind my receiver. The fortune itself was unreadable, which felt symbolic.
Step 2: Sort Into Four Brutal Piles
This is where you stop being polite to your stuff.
- Daily Use — Remotes, current game controllers, the streaming stick you actually watch.
- Occasional — Board games, extra HDMI cables, a backup remote (one, not seven).
- Display Only — Books, vases, framed photos, the ONE decorative object you actually like.
- Get It Out of Here — Dead batteries, broken earbuds, instruction manuals from 2014, that HDMI cable that doesn't work with anything but you're afraid to throw away.
Step 3: Decide What Goes Behind Closed Doors
This is the rule that changed everything for me:
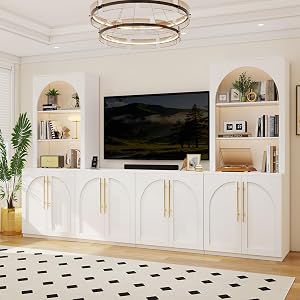
> The Golden Rule of Entertainment Centers: Ugly, frequently-used items go behind closed doors. Beautiful, occasionally-used items go on open shelves. Reverse this and you will never feel calm in your living room again.
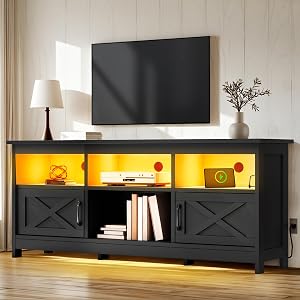
Behind doors: the cable modem, the game console, the surge protector, the loose batteries, the streaming hub, the router if you can hide it without killing signal.
On open shelves: things you genuinely want to look at.
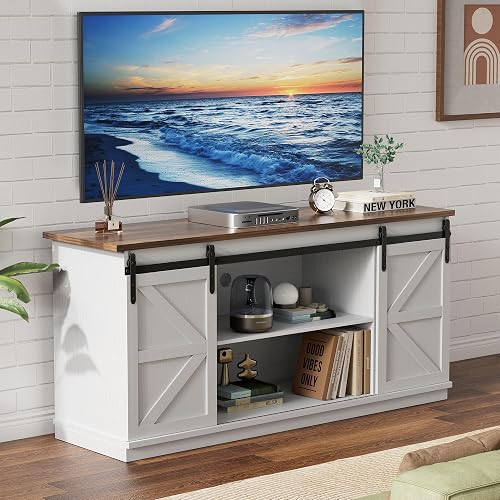
If your current console is all open cubbies, seriously consider one with at least two closed compartments. Adjustable interior shelves are worth paying extra for because component heights vary wildly, and a fixed shelf will betray you the moment you upgrade your console.
Step 4: Style the Open Shelves in Odd Numbers
Here's a designer secret that costs nothing: the human eye loves odd numbers.
Group objects in threes or fives, varying height and texture. A short stack of books, a medium vase, a small sculptural object. That's a vignette. Repeat on the other side with different items at different heights so your eye moves naturally across the console instead of getting stuck in one spot.
> The 30% Rule: Leave at least 30% of each open shelf empty. Negative space is what separates "styled" from "cluttered." I had to physically remove three objects from each shelf before mine started looking intentional instead of overstuffed.
Step 5: Wrangle the Cables (The Step Everyone Skips)
This is where most people give up. Don't. The payoff here is enormous.
Unplug everything. Then plug each component back in one at a time, labeling both ends of every cable with a small piece of masking tape and a Sharpie. "PS5 power." "Soundbar HDMI." "Roku." Future-you will weep with gratitude the next time something stops working.
Route all cables through a single channel along the back of the console. Use velcro ties, not zip ties, so you can adjust them later without scissors and frustration.
Pro Tips Most Guides Won't Tell You
> Expert Tip #1: Buy a powered surge protector with USB ports built in. It eliminates two or three wall-warts immediately and frees up outlet space you didn't know you needed.
> Expert Tip #2: Photograph the back of your setup BEFORE unplugging anything. You will absolutely forget which port the optical audio cable came from. Phone cameras exist for moments exactly like this.
> Expert Tip #3: A small drawer organizer inside one of your closed compartments is the single highest-ROI purchase you'll make. Remotes, batteries, controllers, all in their own little homes.
Common Mistakes That Sabotage Even Beautiful Consoles
- Soundbar overhang — If it sticks past the edge, the whole setup looks unbalanced. Measure first.
- Too many small objects — Three medium objects always beat seven small ones. Always.
- Mismatched cable colors — White HDMI, black power cord, gray ethernet. Use cable sleeves to unify them.
- The router on display — Hide it. It's not a sculpture.
- Family photos everywhere — Pick two or three favorites. The rest can live on a gallery wall.
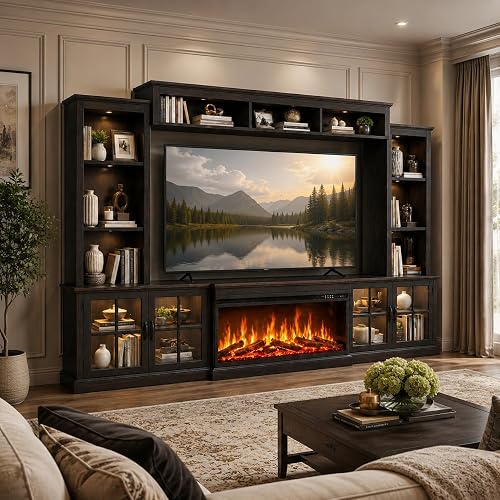
The Final Walkthrough
Once everything is plugged in, labeled, styled, and dusted, step back ten feet. Look at the whole console as a single visual unit. Squint, even. If your eye gets stuck on one spot, something is too big, too bright, or too crowded. Adjust.
Then do the final test: can you find the remote in under five seconds with the lights off? If yes, you've won. If not, your daily-use storage isn't quite right yet, and that's an easy fix.
The Bottom Line
A great entertainment center isn't about expensive furniture or showroom styling. It's about a console that fits your stuff, a system that hides the ugly, and a styled surface that respects the eye. Three weekends of effort buys you years of calm every time you walk into the room.
Now go measure your soundbar. Seriously, go do it.
Key Takeaways
- Choosing the right how to organize entertainment center means matching capacity and output ports to your actual devices
- Always check actual watt-hours (Wh), not just watts — runtime depends on Wh, not peak output
- Also covers: media console storage ideas
- Also covers: declutter TV stand
- Also covers: entertainment center styling
- Compare price-per-Wh across models to find the best value for your budget